
Getting started with your Electric Vehicle Charger Installation is easier than you might think. First, figure out where you want to install your charger. A garage or a spot near your driveway works great. Make sure it’s close to your electrical panel, so you can connect it without a hassle.
Next, check the power supply. You’ll need a dedicated circuit for most home chargers. It’s a good idea to have an electrician look at your home’s setup. They can help determine if you need any upgrades. After all, safety first!
Once you have your location and power sorted, it’s time to get your charger. There are many types out there, from slow chargers to fast ones. Choose one that fits your driving habits. If you’re always in a rush, a fast charger might be your best bet.
Installation is usually straightforward. Some chargers come with their own mounting kits, which makes things simple. If you're not super handy, don’t hesitate to call in a pro. It’s worth it to ensure everything is done right. After installation, test it out. Plug in your vehicle and make sure it starts charging right away.
Choosing the Right Location for Installation
Finding the right spot for your charger is key. When you're thinking about Electric Vehicle Charger Installation, consider where you'll park your car most often. If it's at home, you want easy access to the charger from your driveway or garage. If you're planning to install it at work, think about how many cars will need charging and the best way to manage that space.
Also, think about the distance from your electrical panel. The closer the charger is to the panel, the easier and cheaper the installation will be. You don’t want to drive up your installation costs with long wiring runs. Plus, it helps to avoid potential voltage drop issues that can come with longer distances.
Next, take the time to consider the location's environment. If you’re installing outdoors, look for a spot that’s shaded to protect the charger from harsh weather. There are weatherproof chargers out there, but keeping them out of direct sunlight or heavy rain can extend their lifespan. Inside garages, make sure it's installed away from clutter and other obstructions.
Finally, don’t forget about your future needs. As electric vehicles get more popular, you might want to expand your setup. If possible, leave room for an extra charger or two down the line. This way, your Electric Vehicle Charger Installation can grow with your needs without requiring a complete redo later.
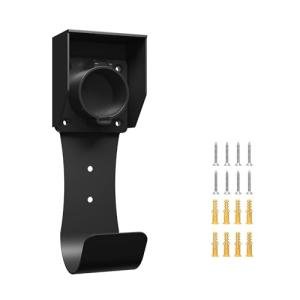
MAX GREEN Wall-Mount EV Charger Nozzle Holster
Keep your charging area tidy and organized with the MAX GREEN Wall-Mount EV Charger Nozzle Holster
Product information
$24.98 $18.55
Product Review Score
4.28 out of 5 stars
143 reviewsProduct links
Installation Step by Step Guide
Ready to get your Electric Vehicle Charger Installation done? Let’s break it down into simple steps. No need to feel overwhelmed; you’ll see it’s pretty straightforward!
First things first, choose your charging location. Look for an area that's dry and accessible to your car. Consider spots near your garage or driveway. It’s also smart to pick a place close to your electrical panel to save on wiring costs.
Next, gather your tools and materials. You’ll typically need a charger, mounting hardware, a drill, screws, and safety gear like gloves. If you’re not comfortable with electrical work, get a licensed electrician in to handle the heavy stuff, especially when it comes to connecting the charger to your home’s electrical system.
Now, let’s mount that charger! Follow the manufacturer’s instructions carefully. Usually, it involves marking the wall, drilling holes, and securing the charger. Make sure it’s at a height that’s easy to access. After that, connect the electrical wires according to the instructions. If you have your electrician helping, this part will be a breeze.
Once the installation is complete, plug your charger into the outlet. Test it out by plugging in your vehicle. If everything lights up, you’re all set! Enjoy charging your electric vehicle at home at your convenience. With your Electric Vehicle Charger Installation done, you’ll save time and make life so much easier.

MUSTART Portable 40 Amp Level 2 EV Charger
Charge your electric vehicle quickly and easily, wherever you go
Product information
Product Review Score
4.65 out of 5 stars
94 reviewsProduct links
Tips for a Smooth Setup Process
Setting up your charger doesn’t have to be a headache. With a little planning and a few handy tips, you can breeze through the Electric Vehicle Charger Installation process. Here are some friendly pointers to keep things smooth and simple.
First off, pick the right location for your charger. Look for a spot that’s close enough to your electrical panel and has access to your parking area. It’ll save you time and hassle. Think about your daily routine too. If you tend to park in the garage, that’s a solid choice. Just remember, make sure there’s enough space for you to plug in without any jams.
Next, don’t skip on checking the electrical requirements. Different chargers need different amounts of power, so make sure your home’s electrical system can handle it. This is a great time to consult with an electrician. They can help you figure out what’s best and keep everything safe.
Once you've got the spot and the power sorted, gather your tools. Trust me, having everything on hand makes things much quicker. You might need a drill, screwdrivers, and maybe some pliers. Just check your charger’s manual for any specifics to make your installation go off without a hitch.
Finally, take your time! Rushing can lead to mistakes. Follow the instructions carefully, and don't be afraid to ask for help if you need it. The goal is to get your Electric Vehicle Charger Installation done right so you can hit the road smoothly and enjoy all the benefits of having your own charger at home.


