
When it comes to Electric Vehicle Charger Installation, understanding the different types of chargers is key. Not all chargers are created equal, and knowing your options can help you choose the right one for your needs.
First up, we have Level 1 chargers. These are the basics and plug right into a standard household outlet. While they’re super convenient, they charge your EV slowly—about four to five miles of range per hour. Great for overnight charging, but not ideal if you need a quick top-up before heading out.
Next, we have Level 2 chargers. If you want to speed things up, this is the way to go. They require a dedicated 240-volt outlet and can charge your vehicle much faster, usually adding 25 to 30 miles of range per hour. This type is perfect for home installations or public charging stations, making it a popular choice among EV owners.
Then there are DC fast chargers. These are the heavy hitters in the charging world. They can charge your EV up to 80% in about 30 minutes. However, they aren’t typically used for home Electric Vehicle Charger Installation because they require extensive electrical work and are usually found at public charging stations on highways.
Understanding these differences helps you make a smart choice for your charging needs. Whether you're plugging in at home or on the go, knowing what each type offers can make a big difference in your EV experience.
Choosing the Right Location for Installation
Choosing the right location for your Electric Vehicle Charger Installation is key to making your life easier. You want to think about convenience and accessibility, so you can plug in without any hassle. Look for a spot that’s close to your parking space, like your garage or driveway. It saves you from awkwardly stretching cables across your yard.
Lighting plays a big role too. Make sure the area is well lit, especially if you're charging after dark. You’ll appreciate the extra visibility when you’re pulling in and plugging out. If you have outdoor options, consider weather-resistant chargers that can handle rain and wind. Trust me, you don’t want to deal with equipment that's not built for the elements.
Consider how your charger connects to your home’s power supply. It should be in a spot that allows for easy wiring without any complicated changes. Hiring a pro for the Electric Vehicle Charger Installation can make this part simpler. They can handle any electrical work and ensure everything meets local codes.
Lastly, think about who uses it. If your household has multiple drivers with electric vehicles, placing the charger in a central location benefits everyone. You’ll avoid the hassle of having to play musical chairs with parked cars. A little planning goes a long way in ensuring that your Electric Vehicle Charger Installation is smooth and hassle-free.

ShockFlo 16 Amp Portable EV Charger with 6M Cable
Charge your electric vehicle at home or on the go with this versatile and convenient portable charger
Product information
$159.99
Product Review Score
4.16 out of 5 stars
148 reviewsProduct links
Basic Tools You’ll Need for Setup
Starting your Electric Vehicle Charger Installation doesn’t have to be a headache. Getting the right tools ready makes the whole process a lot smoother. Here’s a quick list of what you’ll need to get the job done right.
Having these tools handy will keep your Electric Vehicle Charger Installation quick and efficient. You’ll be surprised at how easy it can be when you’re prepared!
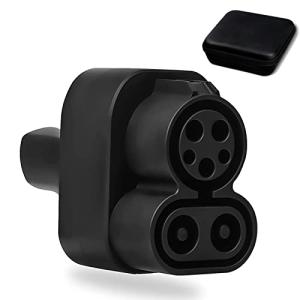
Arozk CCS Charger Adapter for Tesla Models
Charge your Tesla quickly and effortlessly with this reliable CCS adapter
Product information
$181.04
Product Review Score
4.45 out of 5 stars
141 reviewsProduct links
Step by Step Installation Guide
Installing an electric vehicle charger doesn’t have to be a headache. Follow these simple steps for an easy Electric Vehicle Charger Installation that’ll have your EV charged up in no time!
1. Choose the Right Spot: Find a convenient location for your charger. It should be close to your parking space and provide easy access to a power source. Check for any obstructions that might get in the way.
2. Gather Your Tools: Before you start, make sure you have everything you need. Here’s a quick list:
3. Follow the Instructions: Each charger comes with its own set of installation instructions, so be sure to read them carefully. Most chargers have a straightforward step-by-step guide that walks you through the process, from mounting to wiring.
4. Mount the Charger: Use your level to ensure the charger is straight and mark the drilling spots. Then, drill holes and secure the charger to the wall. Double-check that it’s secure before moving on.
5. Connect to Power: This is where things get a bit serious. If you’re not comfortable handling electrical work, it’s best to call a professional. But if you’re handy, follow the wiring instructions closely, ensuring everything is fully connected and safe.
Just like that, you’re set for Electric Vehicle Charger Installation! With these steps, charging your EV at home will be a breeze.


