
Installing your own electric vehicle charger might sound tricky, but it’s easier than you think. With a little guidance, you can set up your charger without a hitch. Here are some simple steps to help you out.
First off, choose the right location. Look for a spot near your parking space that’s close to your electric panel. The closer, the better! Make sure there’s enough space for the charger and that it’s easily accessible. Then, gather your tools. Most of the time, you'll need a drill, screwdriver, level, and a wrench. Keep it simple!
Next, it’s time to mount the charger. Follow the manufacturer’s instructions to get the mounting bracket up on the wall. Use your level to ensure it's straight. Once that’s done, attach the charger to the bracket. It should slide right on without any fuss.
Now you get to connect the charger to your electric panel. If you’re not comfortable doing electrical work, this is a great time to call in a pro. But if you're up for it, make sure to turn off the power first. Connect the wires as directed, and double-check everything before turning the power back on. Safety first!
After that, it’s just a matter of testing your charger. Plug in your vehicle and watch it power up. Congratulations! You’ve just completed your electric vehicle charger installation. Enjoy all those effortless charging sessions!
Choosing the Right Charger for Your Home
Picking the right charger for your home is crucial for a smooth Electric Vehicle Charger Installation. You want something that fits your lifestyle and charging needs. Here are a few things to consider when making your decision.
First off, think about your car’s specifications. Different EVs have different charging capacities. Make sure the charger you choose can handle your vehicle’s requirements. You can usually find this info in your owner's manual or on the manufacturer's website.
Next, consider where you’ll be using the charger. Do you have a garage or a dedicated parking spot? A Level 2 charger is great for home installation because it charges faster than a Level 1 charger, saving you time.
Lastly, ease of installation matters. Some chargers are plug-and-play, while others may need professional installation. If you’re not handy with tools, you might want to go for a model that comes with a professional installation option to make your Electric Vehicle Charger Installation a breeze.
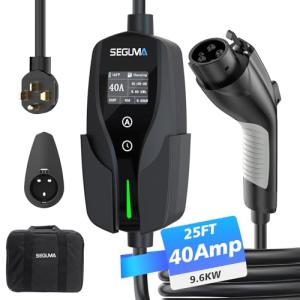
SEGUMA 40Amp Level 2 EV Charger with 25FT Cable
Charge your EV quickly and conveniently from the comfort of your home
Product information
$219.99 $170.99
Product Review Score
4.3 out of 5 stars
136 reviewsProduct links
Tips for Safe and Efficient Setup
Setting up your electric vehicle charger doesn’t have to be stressful. Let’s go through some tips to make your Electric Vehicle Charger Installation safe and efficient. First, make sure you choose a location that’s convenient. You want your charger to be easily accessible but also protected from the elements, like rain or snow.
Check your electrical system before you start. If your home’s wiring or breaker box isn’t up to snuff, you might run into problems later. It’s best to have a qualified electrician take a look. They can determine if you need any upgrades to support your new charger. This is an essential step in your Electric Vehicle Charger Installation process.
Next, read up on your charger’s manual. It’ll have specific instructions and safety warnings that you shouldn’t overlook. Knowing how to install and use your charger properly helps prevent issues down the road. If you're unsure about any steps, don't hesitate to reach out to customer support or consult a professional.
Finally, think about your charging habits. If you plan to charge overnight, make sure the charger is easily accessible from your parking spot. If you want to charge fast, check if your charger is compatible with your vehicle for optimal performance. Your Electric Vehicle Charger Installation can be a breeze if you plan ahead and pay attention to the details!

BiaHawn Level 1&2 EV Charger for Tesla & J1772
Charge your Tesla or J1772 vehicle quickly and easily at home with this versatile EV charger
Product information
Product Review Score
4.65 out of 5 stars
212 reviewsProduct links
Maintaining Your Charger for Longevity
Keeping your charger in top shape doesn’t have to be a hassle. Regular maintenance can extend its life and ensure it always performs at its best. Start with simple things like checking your charger’s cable for any wear and tear. If you notice any fraying or damage, it’s best to replace it. A healthy cable goes a long way in preventing potential issues.
Next, make it a point to keep the charging port clean. Dust and debris can build up over time. A soft cloth or a gentle brush can help you wipe away any dirt. This little routine can prevent connectivity problems and help your charger run smoothly. Plus, it’s super quick and easy!
Also, avoid exposing your charger to harsh weather. If it lives outside, consider investing in a weatherproof cover or a sheltered spot. Extreme temperatures can affect performance. Just like you wouldn’t leave your phone charger out in the rain, keeping your electric vehicle charger protected is key to longevity.
Lastly, always update your charger’s software if it has that option. Manufacturers often release updates that can fix bugs or improve functionality. Just like with your apps, a quick update can make a big difference! Taking these simple steps can help ensure that your electric vehicle charger installation serves you well for years to come.


