
Picking the right charger for your electric vehicle is super important. There are a few things to keep in mind when you're choosing one. First off, think about how fast you want to charge your car. Level 1 chargers are the slowest but are perfect if you just want to plug in overnight at home. Level 2 chargers are much faster and a great option if you need a quicker charge during the day.
Another big factor is where you'll be using the charger. Are you installing it at home, or do you need something portable for road trips? If it’s for home use, make sure to check your garage or driveway's setup to ensure you have the right power supply. A professional can help with electric vehicle charger installation to make sure everything is safe and up to code.
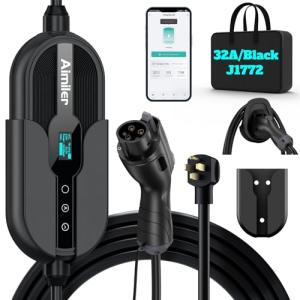
Don’t forget about the plugs! Your vehicle and charger need to match. Most EVs use a standard Type 1 or Type 2 connector, so it’s smart to double-check what you need. If you're looking for convenience, consider smart chargers that connect to Wi-Fi and let you monitor charging through an app. It’s a cool feature if you want to keep track of your energy usage.
Lastly, budget matters. Chargers come in all price ranges. Go for quality over trying to save a few bucks. A good charger will last longer and keep your car running smoothly. Take your time, do some research, and find the best fit for your lifestyle. With the right charger, electric vehicle charger installation will be a breeze!
Simple Steps for Installing Your Charger
Getting your electric vehicle charger set up doesn’t have to be a hassle. Here are some simple steps for easy Electric Vehicle Charger Installation that you can follow to get your charger up and running in no time.
1. Choose the Right Location
Start by picking a spot that’s convenient for your parking situation. Make sure you have easy access to your vehicle’s charging port. Ideally, look for a location close to your electrical panel to keep wiring simple and cost-effective.
2. Gather Your Tools
Before diving in, grab a few essential tools. You’ll typically need:
Having everything on hand makes the process smoother.
3. Follow the Manual
Each charger comes with a manual that guides you through installation. Follow the instructions closely, especially when it comes to wiring. If your charger is hardwired, consider getting a pro to help with the electrical connections.
4. Connect and Test
Once everything is hooked up, turn on your circuit and test the charger. Plug in your vehicle to ensure everything works as it should. If it powers up without any issues, you're good to go!
AIMILER Level 2 EV Charger with 25ft Cable
Charge your electric vehicle quickly and easily from the comfort of home
Product information
$299.99 $189.99
Product Review Score
4.6 out of 5 stars
109 reviewsProduct links
Common Installation Mistakes to Avoid
Installing an electric vehicle charger can be a breeze, but some common mistakes can turn it into a real headache. Let’s go over a few things to watch out for during your Electric Vehicle Charger Installation to keep everything running smoothly.
First off, think about location. A good spot for your charger is key. Don't stick it in a cramped space or too far from your parking area. Your charging experience should be convenient, so make sure it’s easily accessible. Also, look out for any potential obstacles or hazards, like low ceilings or clutter.
Next, wiring is crucial. It might be tempting to cut corners, but always go for quality wiring and appropriately sized circuits. Using the right gauge wire and ensuring your home’s electrical system can handle the load makes a huge difference in performance. This isn’t just about doing it right; it's about keeping everything safe.
Don’t forget about permits and local codes, too. Some places require permits for electrical work. Skipping this step can lead to costly setbacks. Check with your local building department before you dive into your Electric Vehicle Charger Installation. It’s an easy step that saves you grief down the road.
Finally, consider the weather. If you live in an area with extreme temperatures, choose a charger that can withstand the elements. Outdoor-rated chargers are designed to handle rain, snow, and heat without breaking down. You want your charger to work well, no matter what Mother Nature throws at you!

MUSTART Portable Level 2 Charger for Tesla
Charge your Tesla quickly and easily at home or on the go with this compact and reliable charger
Product information
$269.00 $219.00
Product Review Score
4.14 out of 5 stars
133 reviewsProduct links
Troubleshooting Your Charger Setup
Getting your electric vehicle charger set up should be a breeze, but sometimes things don’t go as planned. If you run into hiccups during your electric vehicle charger installation, don’t sweat it. Let’s tackle some common issues together.
First off, double-check your outlet. Make sure it’s the right voltage for your charger. Most home chargers need a 240-volt outlet, but you might find a standard 120-volt outlet in some areas. If the voltage isn’t right, your charger could get confused and refuse to work.
Next up, check the connections. Is everything plugged in securely? Sometimes loose connections can cause your charger to act up. Wiggle the cables a bit to see if they’re snug. If things still feel off, inspect the plugs for any damage. A frayed or broken cord won’t help anyone.
If your charger has any indicator lights, pay attention to them! Most chargers use lights to tell you what’s happening. A blinking light can indicate a problem, while a steady light usually means everything is good to go. Check the user manual for what those lights mean for your specific charger model.
Finally, don’t hesitate to consult the manufacturer’s website or customer support if you’re still stuck. They often have troubleshooting guides that can help you get back on track in no time. With a few tweaks and some patience, you’ll have your electric vehicle charger installation running smoothly. Happy charging!


