
Getting started with EV Charger Home Installation is simpler than you might think. First off, you need to choose the right charger for your electric vehicle. Level 1 chargers work great for those who don’t drive a lot and just need a quick overnight charge. If you’re on the road often or have a bigger battery, a Level 2 charger is your best bet. It charges faster and gets you back on the road in no time.
Next, you’ll want to figure out the best location for your charger. Keep in mind that it should be easily accessible yet safe from weather conditions. A spot in your garage or close to your home's electric panel is usually ideal. Make sure there’s enough space for the vehicle to plug in without any hassle.
After you've selected the right charger and location, it’s time for installation. This part can feel a bit tricky, but don’t worry. If you’re comfortable with simple electrical work, you might tackle this as a DIY project. Always read the installation manual carefully. And if things get a bit too complicated, just hire a professional. It's worth it for your peace of mind.
Finally, double-check everything once it’s installed. Ensure the charger is connected properly and is functioning as it should. Running through a quick test will confirm that your EV Charger Home Installation is a success! Now you’re all set to enjoy the convenience of charging your EV at home.
Choosing the Right Charger for Your Home
Next, think about the charging speed you want. If you’re patient and don’t drive a lot every day, a level 1 charger might do the trick. It plugs into a standard outlet and works for overnight charging. But if you need quicker charges or drive long distances regularly, a level 2 charger is the way to go. It’ll get your battery back in action a lot quicker!
Installation is another factor to consider in your EV Charger Home Installation journey. Some chargers are easier to set up than others. If you’re going with a level 2 charger, you might need a qualified electrician to handle the installation, especially if your home’s electrical panel needs upgrades. Always check your local building codes and permits to avoid any hiccups.
Finally, don’t forget about the location of your charger. If you park in a garage, that’s usually the best spot. But if you park outside, make sure the charger is weather-resistant. You want to keep it durable and safe no matter the weather. Taking your time to pick the right charger ensures you’re set up for easy and efficient charging at home.
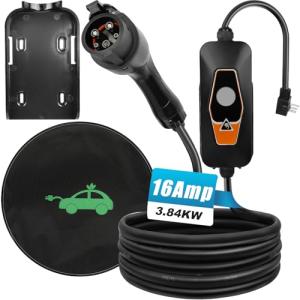
Orceed 16Amp Portable Level 2 EV Charger
Charge your electric vehicle quickly and easily, wherever you go, with the Orceed 16Amp Portable Level 2 EV Charger
Product information
$98.99
Product Review Score
4.41 out of 5 stars
189 reviewsProduct links
Essential Tools for Your Installation Project
Thinking about taking on an EV Charger Home Installation project? That’s awesome! Getting the right tools can make the whole process smoother and way less stressful. Let’s break down the essentials you’ll want in your toolkit.
First off, you’ll need a good assortment of basic hand tools. Here’s what to grab:
Next up, don’t underestimate the power of a quality drill. A cordless drill can save you time and effort, especially when it comes to securing your charger to the wall. Make sure you have drill bits that match the materials you’ll be working with, like concrete or drywall.
Finally, safety gear is absolutely critical. Grab some gloves and safety glasses to protect yourself while you’re getting everything set up. An easy installation is a safe installation, after all!
With these essential tools in your corner, your EV Charger Home Installation will be a lot smoother. You’ll be set to tackle your project with confidence! Let’s get charging!
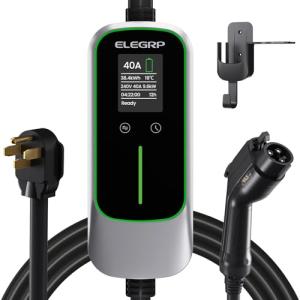
ELEGRP 40 Amp Level 2 EV Charger, 25ft Cable
Charge your electric vehicle quickly and efficiently with this powerful and convenient charger
Product information
$279.99 $229.99
Product Review Score
4.24 out of 5 stars
163 reviewsProduct links
Tips for a Smooth Installation Process
Getting your EV Charger Home Installation right can make all the difference in how smoothly things go. Here are some helpful tips to keep the process hassle-free!
First off, plan your setup. Think about where you park your car and how far the charger will be from your electrical panel. Measure the distance to ensure you get cables long enough, but not so long that it creates unnecessary clutter. You want everything to look neat and tidy!
Next, check your electrical capacity. You need to know if your home’s electrical system can handle the added load of a charger. If you're unsure, consult an electrician. It’s better to double-check this before diving into the installation.
When you’re ready, gather all the right tools. Having everything on hand will save you time and frustration. Typical tools include a drill, screwdriver, and wire cutters. Don’t forget safety gloves and goggles—your safety should always come first!
Lastly, read the instructions that come with your EV charger. Each unit is a bit different, so understanding the specifics will help you avoid any bumps in the road. If you’re feeling a bit stuck, don’t hesitate to reach out to customer support. They can be a great resource during your EV Charger Home Installation journey.


