
When you're diving into EV Charger Home Installation, picking the right spot for your charger is super important. You want a spot that’s convenient for your daily routine and accessible for your vehicle. Think about where you usually park your car. If you have a garage, that's a great option. You can charge your car without worrying about the weather or anyone else getting in the way.
Another thing to consider is the distance from your electrical panel. The closer your charger is to the panel, the easier and cheaper it is to set up. If it’s too far away, you might need to run a long cable, which can be a hassle. Plus, having a shorter distance can keep installation costs down, which is always a bonus!
Lighting is also a key factor. Make sure the area is well-lit for safe plug-in and unplugging, especially during those late-night charging sessions. You don’t want to fumble around in the dark! If the area outside your home seems a bit dim, consider adding some lights to brighten your charger’s spot.
Lastly, keep potential tripping hazards in mind. You don’t want to trip over cords or bump into anything while you’re charging. Plan for a tidy setup with clear pathways. This way, EV Charger Home Installation will feel less like a chore and more like a smooth addition to your home!
Essential Tools for Home Installation
When you're diving into EV Charger Home Installation, having the right tools makes the job a whole lot easier. You don’t want to get halfway through and realize you’re missing something essential. Let’s break down the must-have tools you’ll need to tackle this project confidently.
First up is a good quality drill. You'll want a drill that can handle both wood and concrete. This helps you secure the charger to the wall and ensures everything is nice and sturdy. A stud finder is also key—it’ll help you locate the best spots to drill, making sure your charger can hold up over time.
Don't forget the wire strippers and electrical tape! These tools are crucial if you need to handle any wiring. You'll be working with electrical parts, so keep safety in mind. Wearing gloves can protect your hands, too. If you’re unsure about any wiring, it might be worth having a voltage tester handy. It gives you peace of mind that everything is safe and secure before you plug in your charger.
Finally, a level is your best friend for keeping everything straight. Trust me, it’s way easier to make sure your charger is perfectly aligned from the get-go rather than fixing it later. Having a checklist of these tools can really help streamline your EV Charger Home Installation process and ensure you’ve got everything you need to get the job done right.
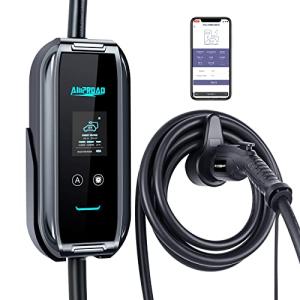
AMPROAD iFlow P9 Adjustable EV Charger 40A-10A
Charge your electric vehicle quickly and easily with the versatile AMPROAD iFlow P9, perfect for any home setup
Product information
$269.99
Product Review Score
4.95 out of 5 stars
56 reviewsProduct links
Step by Step Installation Guide
Installing an EV charger at home can seem daunting, but it’s really not as tricky as it sounds. Here’s a simple step-by-step installation guide to help you through the process of your EV Charger Home Installation. Let’s get started!
1. Choose the Right Location: Pick a spot close to your parking area that has access to your home’s electrical panel. Make sure it’s sheltered from the elements if possible. You want it handy for easy plug-ins!
2. Gather Your Tools: You’ll need a few basic tools like a drill, screwdriver, and pliers. If you plan to do any wiring, having wire strippers and a voltage tester is essential. And of course, have your charger kit ready too!
3. Install the Mounting Bracket: Most EV chargers come with a mounting bracket. Attach it to the wall following the manufacturer’s instructions. Make sure it’s level and secure. You don’t want your charger wobbling around.
4. Connect the Wires: Now it’s time to wire it up. Follow the guidelines in your charger’s manual closely. It’s super important to understand where each wire goes. If you’re not comfortable with electrical work, don’t hesitate to call in a pro!
5. Test Your Charger: After everything is hooked up, turn on the power and give it a test run. Plug in your EV and make sure it’s charging. If you encounter any issues, check the connections again and ensure everything is in place. Your EV Charger Home Installation is almost ready!

FlowGo 50A Level 2 Tesla Smart Charger
Charge your Tesla quickly and easily with this powerful 50A smart charger designed for home use
Product information
$389.99
Product Review Score
4.2 out of 5 stars
164 reviewsProduct links
Tips for Testing Your EV Charger
When you get your EV charger installed at home, it’s important to make sure everything’s working smoothly. Here are some tips to help you test your charger like a pro!
First, check all your connections. Make sure the charger is plugged into a functioning outlet. If you're using a hardwired charger, take a look at the wiring. Sometimes, loose connections can cause issues. A quick visual inspection can save you from headaches later on.
Next, try charging your vehicle. Plug it in and watch for indicators on the charger. Most chargers have lights that change color to show charging status. Green usually means "all good," while red might mean you need to troubleshoot. Check your car’s dashboard for charging progress too!
If something seems off, consult the charging manual that came with your unit. It usually covers common troubleshooting tips. Don’t forget to look for any software updates for your car or charger, as these can affect performance. Regular updates help keep everything running smoothly.
Lastly, give it a test run over a week or so. This will help you see if any issues pop up. If your charger consistently works without problems, you’re in great shape with your EV Charger Home Installation. Enjoy charging up and hitting the road!


