
Getting started with EV Charger Home Installation is easier than you might think. If you've recently bought an electric vehicle, setting up a charger at home can save you time and ensure you never run out of juice. Let’s break down the steps you need to get things rolling.
First, assess your home’s electrical system. Most chargers require a dedicated circuit, so you’ll want to check if your electrical panel can handle the load. If you're unsure, calling in a professional electrician is a smart move. They can evaluate your situation and recommend the right setup.
Next, choose the right EV charger for your needs. There are Level 1 and Level 2 chargers. Level 1 chargers are slower and usually plug into a standard outlet, while Level 2 chargers are faster and can be hardwired into your electrical system. If you want quicker charging times and you generally drive more, a Level 2 charger might be the better choice.
After you've picked your charger, it's time to find the ideal spot for installation. Look for a location that’s close to your parking spot, ideally inside your garage or near an external wall if you park outside. Ensuring it's easily accessible will make your charging routine smoother.
Finally, once everything is in place, you can start enjoying the convenience of having your very own EV charger at home. With EV Charger Home Installation, you can charge overnight and hit the road fully charged every day. It’s all about making your electric vehicle experience as hassle-free as possible!
Choosing the Right Charger for Your Needs
Choosing the right charger is a big deal when it comes to your EV Charger Home Installation. Not all chargers are created equal, and picking the right one makes your charging experience smooth and hassle-free. Think about how often you drive and your vehicle's battery size to figure out what you really need.
Level 1 chargers are the simplest. They plug into a standard wall outlet and are great for overnight charging. If you’re not in a rush and drive short distances, this could work well for you. But if you've got longer daily drives, a Level 2 charger could be the better option. These can charge your car much faster and might save you time in the long run.
Don't forget to check the amperage too. Most home chargers range from 16 to 40 amps. A higher amp charger can juice up your vehicle quicker, which is super handy for busy folks. And make sure to consider the installation process. Some chargers are easier to install than others, so you might want to factor that into your decision.
Finally, think about smart chargers. They come with extra features like scheduling, energy monitoring, and even remote access through your phone. If tech is your thing, these can add some serious convenience to your EV Charger Home Installation. Whatever you decide, just make sure it fits your lifestyle and driving habits. Happy charging!
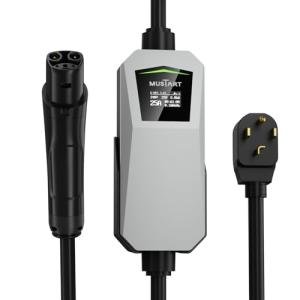
MUSTART Level 2 Portable Tesla Charger, 25A
Charge your Tesla quickly and conveniently anytime, anywhere with this reliable portable charger
Product information
$239.00
Product Review Score
4.19 out of 5 stars
98 reviewsProduct links
Step by Step Installation Guide
Installing your EV charger at home might sound tricky, but it’s pretty straightforward if you follow these steps. Let’s break it down so you can get that charger up and running in no time!
First things first, gather your tools. You’ll need a drill, a screwdriver, a level, and maybe a wrench, depending on your charger model. Don’t forget your safety gear, like gloves and goggles, to keep yourself safe while you work.
Next, decide where you want to install your charger. Look for a spot close to your parking area with easy access to your electrical panel. Once you pick a location, use your level to ensure the wall mount is straight. Mark the spots where you’ll drill, and then go ahead and attach the mount securely.
After the mount is in place, it’s time to connect the electrical wiring. If you're not comfortable with this part, it’s a smart move to hire a licensed electrician. They’ll ensure everything is code-compliant and safe. Just make sure that your new EV charger is compatible with your electrical system!
Lastly, test your charger before taking your first drive. Plug in your EV and check the display to make sure everything is functioning properly. If it’s all good, you’re ready to enjoy the convenience of your new EV charger at home! With these tips on EV Charger Home Installation, you're all set to power up your ride hassle-free.
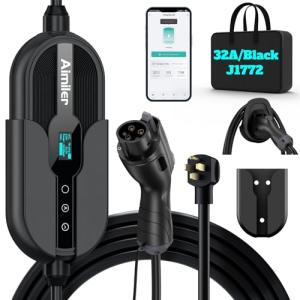
AIMILER Level 2 EV Charger with WiFi App
Charge your electric vehicle smarter and faster with this convenient WiFi-enabled charger
Product information
$299.99 $189.99
Product Review Score
4.19 out of 5 stars
116 reviewsProduct links
Tips for Maintaining Your EV Charger
Once you get your EV charger home installation set up, keeping it in tip-top shape is key. A little care goes a long way! Here are some straightforward tips to help you maintain your charger and ensure it works like a charm.
First off, regularly inspect the charger and its cables for any wear and tear. Look for frayed wires, cracks, or any signs of damage. If you notice something off, don’t wait around—call a professional to get it checked out. Keeping everything in good condition will help your charger last longer and charge your car safely.
Keep the area around your charger clean and free of debris. Dust, dirt, and leaves can mess with your unit. If you have a wall-mounted charger, make sure it’s securely attached to the wall and not obstructed. A clear space helps with air circulation and prevents overheating during charging.
Consider using a surge protector, especially if you live in an area prone to storms or frequent power fluctuations. This little investment can protect your charger from electrical spikes, extending its lifespan. And remember to check the firmware or software updates for smart chargers; keeping them updated can enhance performance.
Finally, if you’re using your charger regularly, don't forget to give it a little love! This means unplugging and reconnecting every now and then, which can help prevent any sticky connections. By following these simple maintenance steps, you’ll ensure that your EV charger home installation serves you well for years to come.


