
When it comes to choosing the right charger for your electric vehicle, it’s all about your lifestyle and needs. Different chargers offer various charging speeds and features, so let’s break that down simply.
First off, think about the charging speed. There are three main types:
Next, consider where you’ll charge your EV. If you plan on doing most of your charging at home, a Level 2 charger is a great investment. Plus, don't forget about the installation! A proper Electric Vehicle Charger Installation can save you headaches later.
Also, keep an eye on special features. Some chargers come with Wi-Fi connectivity or smart features that allow you to monitor charging from your phone. It’s convenient to check battery status or manage charging times, especially if you want to take advantage of off-peak electricity rates.
Ultimately, choosing the right charger boils down to your driving habits and charging preferences. Just think about how you use your vehicle, and you’ll find a charger that fits like a glove!
Preparing for a Smooth Installation
Getting ready for your Electric Vehicle Charger Installation doesn’t have to feel overwhelming. With a little prep work, you’ll set the stage for a smooth setup. First things first, figure out where you want to install your charger. Think about your parking situation. Is there an outlet nearby, or will you need to run some wiring? A convenient spot can save you time and hassle later.
Next, check your electrical panel. Make sure it can handle the extra load of your new charger. If you're unsure about it, consult with a licensed electrician. They can assess what you have and let you know if any upgrades are needed. It’s always better to be safe than sorry!
Once you've sorted out the location and the electrical capacity, gather any permits you might need. Some areas require permits for installations, and having all the paperwork ready can speed things up. Don’t forget to check local regulations or homeowner association rules too. Staying within the guidelines keeps everything smooth sailing.
Lastly, consider your charger model. Some chargers need special mounting equipment or specific installation requirements. Read the manual or product specs thoroughly before installation day. Whether you're going DIY or hiring a pro, knowing these details helps ensure everything fits as it should.
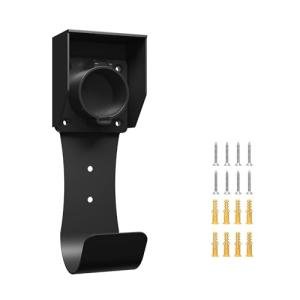
MAX GREEN Wall-Mount EV Charger Nozzle Holster
Keep your charging area tidy and organized with the MAX GREEN Wall-Mount EV Charger Nozzle Holster
Product information
$24.98 $18.55
Product Review Score
4.28 out of 5 stars
143 reviewsProduct links
Step by Step Installation Process
Getting your electric vehicle charger set up doesn’t have to be a hassle. Here’s a simple step-by-step guide to make your Electric Vehicle Charger Installation a breeze.
1. Choose the Right SpotFirst things first, pick where you want to install your charger. Ideally, it should be close to where your car will park. Make sure there’s enough space and easy access to your home’s electrical panel.
2. Gather Your ToolsBefore diving in, gather all the tools you’ll need. This usually includes wire cutters, a drill, screws, and a voltage tester. Don’t forget your user manual too; it’s full of helpful info specific to your charger.
3. Turn Off PowerSafety is key! Turn off the power at your main electrical panel before you start wiring. This way, you can work without the worry of electric shock.
4. Connect the WiresFollow the wiring instructions in the manual. Connect the appropriate wires from the charger to your home's electrical system. Usually, it involves a few screws and matching colors, but take your time to double-check everything.
5. Final Checks and Power UpOnce everything is hooked up, do a quick check. Look for any loose wires or connections, and make sure everything is in place. If everything looks good, turn the power back on. Test your charger to make sure it’s working!
And that’s it! Your Electric Vehicle Charger Installation is complete. Enjoy the convenience of charging at home!
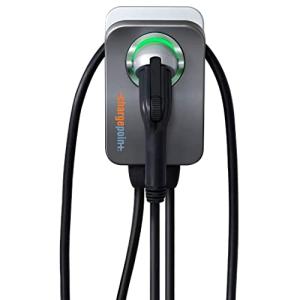
ChargePoint Home Flex Level 2 EV Charger
The ultimate solution for fast and flexible charging at home
Product information
$389.99
Product Review Score
4.38 out of 5 stars
230 reviewsProduct links
Common Installation Questions Answered
Installing an electric vehicle charger might sound a bit overwhelming, but it doesn’t have to be. Let’s tackle some common questions about electric vehicle charger installation that many folks have.
Do I need a professional to install my charger?While it’s possible to handle the installation yourself if you’re handy, hiring a certified electrician is often the best route. They know local codes, can ensure everything is safe, and save you from any headaches.
How long does the installation take?The process can vary, but most installations take around 2 to 4 hours. If it’s a straightforward setup, you’ll be charging your car in no time!
What kind of outlet do I need?It depends on the charger you choose. Some need a standard 120-volt outlet, while others work best with a 240-volt outlet for faster charging. Your electrician can help you figure out what’s best for your situation.
Will I need to upgrade my electrical system?That really depends on your home's current setup and the specifications of your charger. If you go for a high-powered model, upgrading your electrical panel might be necessary. Your electrician can assess that during the installation.


