
Picking the right charger for your home can feel overwhelming, but it doesn’t have to be. You want something that fits your lifestyle and your car. There are a few key factors to keep in mind to make this decision easier.
First, consider charging speed. There are Level 1 chargers that plug right into a standard outlet. They’re super easy to set up but take longer to charge your car. If you need something faster, Level 2 chargers are the way to go. They require a 240V outlet and can charge your vehicle way quicker, so you can get back on the road faster.
Next, think about your home’s electrical system. Some chargers need a higher electrical capacity, which might mean you need an electrician to upgrade your system. Before jumping in, check if your breaker panel can handle a new charger.
Lastly, features matter. Some chargers come with smart technology that lets you monitor and control charging from your phone. This can be a game-changer if you want to take advantage of off-peak electricity rates. Remember, the right choice will make your Electric Vehicle Charger Installation a breeze and keep you charged up for your journeys ahead!
Essential Tools for Installation Success
When it comes to Electric Vehicle Charger Installation, having the right tools on hand makes all the difference. You don’t want to start the project and then realize you’re missing something crucial. Here’s a quick rundown of the essential tools you’ll need to make the process smooth and hassle-free.
1. Voltage Tester: Safety first! A voltage tester helps you confirm that your electrical connections are safe to work on. You’ll avoid nasty surprises that could lead to trouble down the line.
2. Drill with Bits: Whether you’re mounting the charger to a wall or a pole, a good drill is a must. Grab a set of drill bits to ensure you can tackle any surface, whether it's wood, concrete, or drywall.
3. Wire Strippers: You’ll need to connect various cables during Electric Vehicle Charger Installation. Wire strippers let you easily prepare and connect wires without damaging them, making your setup cleaner and safer.
4. Wrenches and Screwdrivers: These are your go-to tools for tightening everything down. Make sure you have both adjustable wrenches and different types of screwdrivers on hand, as various screws and nuts come into play.
Having these tools ready will save you time and frustration. You’ll get through your Electric Vehicle Charger Installation like a pro! Don’t forget to double-check your work. Safety and efficiency go hand in hand during installation.
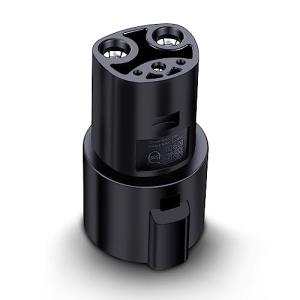
Lectron Tesla J1772 Charger Adapter, 60A 250V
Charge your Tesla effortlessly with this reliable adapter that fits J1772 stations
Product information
$87.27
Product Review Score
4.47 out of 5 stars
33 reviewsProduct links
Step by Step Installation Process
Installing your electric vehicle charger doesn’t have to be a headache. Follow this simple, step-by-step process to get your charger up and running in no time!
Step 1: Gather Your Tools
Before diving in, make sure you have everything you need. Grab a drill, a screwdriver, a level, and, of course, your electric vehicle charger. Having everything on hand saves you those annoying trips back and forth.
Step 2: Choose the Right Spot
Pick a location that’s close to your parking space and near your electrical panel. Make sure it’s a dry area, away from water. A wall-mounted charger is a great option if you have the space. Use a level to ensure it’s straight.
Step 3: Mount the Charger
Using your drill, secure the charger to the wall. Just follow the manufacturer’s instructions for the specific installation process. Most chargers come with mounting brackets, making this step straightforward.
Step 4: Connect to Power
This is where things get a bit technical. You’ll need to connect your charger to the electrical supply. If you’re not familiar with electrical work, it’s smart to call a professional. Safety first! A certified electrician can handle the wiring to ensure everything meets the electrical code.
Step 5: Test It Out
Once everything’s connected, it’s time for a test run. Plug in your electric vehicle and check if the charger works. You should see lights or indicators showing it's charging. If it all looks good, you’re ready to hit the road!

PION POWER 40Amp Flex-AC EV Charger with 22 Ft Cable
Charge your electric vehicle quickly and conveniently with this powerful and flexible charger
Product information
Product Review Score
4.74 out of 5 stars
232 reviewsProduct links
Tips for Safe and Efficient Use
When you dive into Electric Vehicle Charger Installation, keeping safety in mind is key. Here are a few simple tips to help you get the most out of your charger while keeping everything running smoothly.
Start by checking your home’s electrical system. Make sure it can handle the extra load from your EV charger. You might need to upgrade your circuit or consult a professional electrician. It’s better to be safe than sorry!
Positioning is important too. Place your charger in a convenient spot, ideally near your parking space. This way, you won’t have to stretch your charging cable across the driveway or risk tripping over it. Some chargers come with longer cables, which is great for flexibility!
Regular maintenance is a must. Keep the charger clean and check for any wear and tear. If you spot any issues, take care of them right away. A little care goes a long way in extending the life of your charger.
Lastly, always follow the manufacturer’s guidelines for usage. Each model might have specific features that can enhance your charging experience. Getting familiar with your charger will help you use it efficiently and safely.


