
Picking the right charger for your electric vehicle can feel a bit overwhelming, but it doesn’t have to be. Start by figuring out what kind of charging speed you need. If you mostly charge at home, a Level 2 charger is usually a solid choice. It speeds things up compared to a standard outlet and gets you back on the road faster. Think about how often you use your car too. If you drive a lot, investing in a faster charger makes sense.
Next on the list is checking the compatibility with your EV model. Not all chargers work with every car, so double-check the specifications. Most popular brands have solid options that cover various models, but it’s best to ensure you’re not left with a charger that doesn’t fit. It’s like buying shoes that don’t match your feet; not ideal!
Don’t forget about installation. If you’re eyeing that Electric Vehicle Charger Installation, consider whether you want to handle it yourself or hire someone. Some chargers are really easy to set up, while others might need a professional touch, especially if it involves electrical work. Make sure to factor in the installation cost into your budget.
Lastly, look at the added features. Some chargers come equipped with smart technology that lets you monitor your charging habits through an app. Others might have safety features that give you peace of mind. Think about what matters most to you—for some, it's speed, for others, it's extra safety or tech features. Your perfect charger is out there; it just takes a little digging!
Preparing for Installation Day
Getting ready for your Electric Vehicle Charger Installation day can make a big difference in how smooth everything goes. First things first, make sure you’ve got a clear space where the charger will be installed. Clear away any clutter or obstacles that might get in the way. This helps the installation team work faster and gives you peace of mind knowing everything is ready to go.
Next, check your home’s electrical setup. Most chargers need adequate electrical capacity, so if you’re unsure, consider a quick chat with an electrician before installation day. They can help ensure your system meets the requirements and can handle the load without any issues. It’s better to tackle this before the installation begins rather than discovering problems last minute.
Don’t forget about permits! Depending on where you live, you might need to secure a permit for your Electric Vehicle Charger Installation. This can vary by city, so check local regulations online or contact your local authority. Getting this sorted in advance will save you time and hassle on the big day.
Lastly, make sure to communicate with your installation team. Share any specific preferences you have or obstacles in your installation area. Honesty helps ensure they know exactly what to expect and can tailor their approach to meet your needs. And don’t be shy about asking questions; they’re there to help you get set up with the best charger for your EV!
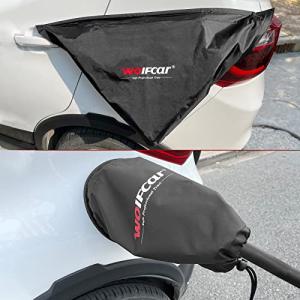
WOLFCAR Magnetic Waterproof EV Charger Cover
Keep your EV charger protected and ready to use with this durable and waterproof magnetic cover
Product information
$18.99
Product Review Score
4.14 out of 5 stars
15 reviewsProduct links
Step by Step Installation Process
Getting your electric vehicle charger up and running is easier than you might think! Let’s break down the Electric Vehicle Charger Installation process step by step.
1. Choose the Right Location: Start by finding a good spot for your charger. Look for a location close to your parking area and an electrical outlet. Make sure it’s sheltered from harsh weather if possible.
2. Gather Your Tools: Before diving in, gather a few tools. You’ll likely need a drill, a screwdriver, a level, and some wire connectors. Having everything at hand makes the installation smoother.
3. Install the Mounting Bracket: Most chargers come with a mounting bracket. Use your drill to secure it to the wall. Use a level to ensure it's straight. A wobbly charger isn’t going to do you any favors!
4. Connect the Wiring: This is where things get a bit technical. Follow the instructions provided with your charger to connect the wiring. If you’re unsure, it’s always best to call in a professional electrician for safety reasons.
5. Test Your Charger: Once everything’s connected, it’s time to test it out. Plug in your vehicle and see if it starts charging. You’ll know you did it right when you see those lights come on!
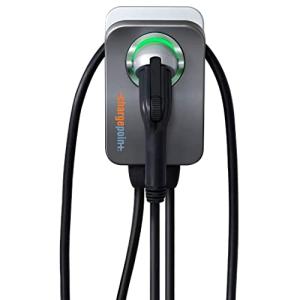
ChargePoint Home Flex Level 2 EV Charger
The ultimate solution for fast and flexible charging at home
Product information
$389.99
Product Review Score
4.38 out of 5 stars
230 reviewsProduct links
Tips for a Smooth Charging Experience
When you're diving into Electric Vehicle Charger Installation, you want to make sure everything goes off without a hitch. Here are some helpful tips to keep your charging experience smooth and stress-free.
First off, think about the location of your charger. Place it where it's easy to access your car. Ideally, it should be somewhere you can park regularly, like your garage or in a spot with a dedicated power supply. No one wants to juggle with long extension cords!
Next, check your home’s electrical setup. Make sure your breakers can handle the load of your new charger. You don’t want to blow a fuse when you’re trying to charge up. If you're unsure, call in an electrician to give you some peace of mind.
Also, make sure to understand the power levels of your charger. There are different types that charge at various speeds. If you're often on the go, a Level 2 charger could save you a lot of time compared to a standard Level 1 outlet.
Lastly, don’t forget about safety! Regularly inspect your charger for wear and tear. Keeping it clean and well-maintained ensures a reliable charging experience over time. A little routine maintenance goes a long way!


