
Picking the right charger for your electric vehicle can feel a bit overwhelming, but it doesn’t have to be. Start by figuring out your charging needs. Do you usually park your car at home, or do you drive long distances? If you’re mainly charging at home, a Level 2 charger is usually the best way to go. It charges faster than a standard outlet, so you can get back on the road in no time.
Check your vehicle’s specifications, too. Different EVs have different charging capabilities. Make sure the charger you’re considering is compatible with your car. Look for chargers that support multiple charging standards, as this can save you hassle if you switch vehicles later on.
Don’t forget about installation location. You want to set up your electric vehicle charger installation in a convenient spot, ideally where it won’t be in the way. Some chargers are designed for indoor use, while others can handle the outdoors, so choose one that suits your needs.
Lastly, think about any extra features you might want. Smart chargers let you schedule charging times and can even help monitor your energy use, which is great for saving money. With the right charger on your side, driving electric can be a breeze!
Preparing for the Installation Process
Getting ready for your Electric Vehicle Charger Installation can feel like a big task, but breaking it down into steps makes it easier. First things first, decide where you want your charger. That spot should be close to your parking space and have easy access to your home's power supply. Think about the cable length too, since you want it to reach your car without being a tripping hazard.
Next up, check your electrical system. You’ll need to know how much power your home can handle. If your system is older, you might need an upgrade. It’s a good idea to get an electrician to take a look. They can make sure your home is ready for that charger without any hiccups.
Also, get familiar with your local codes and regulations. Some areas have specific rules about where and how you can install charging stations. You might need a permit, so check in advance. This can save you time and headaches later on.
If you’re going the DIY route, gather your tools ahead of time. You’ll want things like a drill, a stud finder, and electrical tape. If you’re working with an electrician, make sure you've discussed everything, so everyone’s on the same page. Communication is key to a smooth Electric Vehicle Charger Installation.
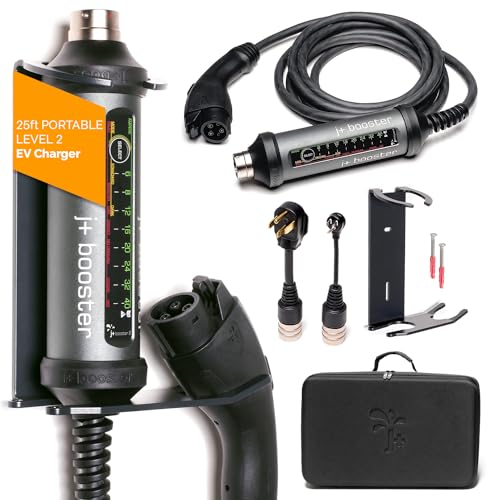
J+ Level 2 Portable EV Charger - 40 Amp
Charge your electric vehicle quickly and conveniently at home or on the go with this powerful portable charger
Product information
$681.49
Product Review Score
4.55 out of 5 stars
172 reviewsProduct links
Step by Step Installation Guide
Installing your electric vehicle charger doesn't have to be a headache. With a little prep and the right tools, you can get it done quickly. Here’s a simple step-by-step guide to help you through the Electric Vehicle Charger Installation process.
Step 1: Choose the Right Location
Find a spot near your parking area and an electrical outlet. Make sure it's sheltered from the weather if possible, so your charger stays in good shape year-round.
Step 2: Gather Your Tools
You'll need a few basic tools for the job: a drill, screws, a screwdriver, and possibly a stud finder. Don’t forget your safety gear, like gloves and goggles!
Step 3: Mount the Charger
Follow the manufacturer’s instructions to securely mount the charger on the wall. Make sure it’s at a comfortable height and is accessible for plugging in your vehicle.
Step 4: Connect to Power
This step might need a professional—especially if you're not comfortable with electrical work. If you're doing it yourself, ensure you turn off the power before connecting your charger to your electrical panel. Double-check everything to be safe!
Step 5: Test It Out
Once everything is hooked up, turn the power back on. Try plugging in your vehicle to make sure the charger works like a charm. If it's charging without issues, you’re all set!
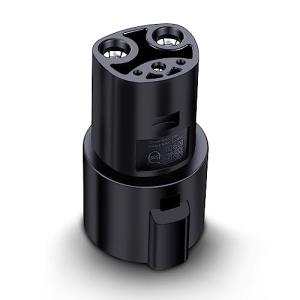
Lectron Tesla J1772 Charger Adapter, 60A 250V
Charge your Tesla effortlessly with this reliable adapter that fits J1772 stations
Product information
$87.27
Product Review Score
4.47 out of 5 stars
33 reviewsProduct links
Common Issues and Troubleshooting Tips
Setting up your electric vehicle charger can be a smooth ride, but sometimes bumps come along the way. Don’t worry! Here are some common issues you might face during your electric vehicle charger installation and some easy fixes to consider.
First off, if your charger isn’t turning on, check the power supply. Make sure it's plugged in and the circuit breaker hasn’t tripped. A quick reset might be all it needs. If the power is good, check the outlet. Sometimes outlets can fail, so try plugging in a different device to see if it works.
Another typical hiccup is slow charging. If your charger feels like it’s taking forever, you might want to check the amperage. Ensure that your charger matches your vehicle’s charging capability. Using a charger with too low of an amperage can slow things down. It’s always a good idea to consult your vehicle’s manual to find the best charging specs.
Sometimes, you might see warning lights on your charger. These can be puzzling, but they usually mean it’s time for a quick check. Refer to the user manual for guidance on what the lights mean. Many chargers have a troubleshooting section with step-by-step tips. If you can’t identify the issue, reaching out to support can help clear things up quickly.
Lastly, if you're facing connectivity issues with a smart charger, try resetting the Wi-Fi connection or checking the app for updates. Your app should let you know if there's a firmware update available. Keeping everything current can help avoid common glitches, making your electric vehicle charger installation a breeze!


