
Picking the right EV charger can feel overwhelming, but it doesn’t have to be. The first thing to consider is your vehicle’s charging capacity. Different electric vehicles have different charging speeds, so check your car's specs to find a compatible charger. Most EVs will work with level 2 chargers, which are great for home use and can get you back on the road quickly.
Next up, think about the installation environment. Do you have a garage or dedicated parking space? If so, a hardwired charger is often a great choice. It keeps everything tidy and can handle higher power levels. If you’re looking for convenience, a plug-in charger might be more your style. They’re easy to install and can be moved if needed.
Don’t forget about the power supply. Depending on your home's electrical system, you might need to upgrade your electrical panel to handle the new charger. If that's the case, consult a professional for advice and a detailed plan for your EV Charger Home Installation. It’s better to take care of any upgrades upfront so you avoid any hassles later on.
Finally, think about smart features. Some chargers come with Wi-Fi connectivity, allowing you to monitor charging times and costs from your phone. This can be super handy for managing your energy use and costs. Take your time comparing options, so you end up with a charger that fits your lifestyle perfectly.
Preparing Your Home for Installation
Getting your home ready for EV charger home installation is a key step that can save you time and hassle later on. Start by picking the best spot for your charger. Look for a location near your parking area, ideally close to an electrical panel. This helps minimize installation costs and ensures you have easy access to plug in your vehicle.
Next, check your electrical panel. You want to make sure it has the capacity to handle an EV charger. Depending on the charger you choose, it may require a dedicated circuit. If your panel isn’t up to par, don’t worry—an electrician can help upgrade it. This might seem like an extra step, but it’s worth it for safety and efficiency.
Think about your charging needs too. How often do you drive? How fast do you want to charge? If you’re a daily driver, a Level 2 charger is the way to go. It provides a faster charging experience compared to a basic outlet. Don’t forget about the charging cables and connectors; make sure they fit your vehicle!
Lastly, clear the area of any obstacles. Remove any clutter around your chosen charging spot, and make sure there’s plenty of room for equipment and easy access. This way, when installation day arrives, everything can go smoothly and you’ll be one step closer to powering up your electric vehicle right at home.
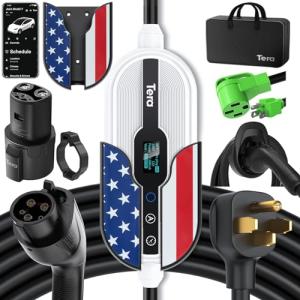
Tera Tesla Level 1 & 2 Portable EV Charger
Charge your Tesla anywhere with this versatile and easy-to-use portable EV charger
Product information
$222.75 $193.54
Product Review Score
4.41 out of 5 stars
162 reviewsProduct links
Step by Step Installation Process
Getting your EV Charger Home Installation right is simpler than you might think. With a little patience and the right tools, you’ll be charging your electric vehicle in no time. Here’s a quick step-by-step guide to help you through the process.
Step 1: Choose the Right Location
Pick a spot close to your parking area and a power supply. Make sure it’s easily accessible. Many folks opt for the garage or a dedicated outdoor area. Just keep in mind that good airflow is key!
Step 2: Gather Your Tools
You’ll need a drill, screws, a level, and possibly some wire cutters. It’s a good idea to have a buddy on hand, too. Two heads are better than one when it comes to positioning and installing the charger safely.
Step 3: Install the Mounting Bracket
Start by attaching the mounting bracket to the wall. Use a level to ensure it’s straight, then securely drill it in place. Double-check that it’s sturdy enough to hold the charger and any wiring.
Step 4: Connect the Wiring
This part can be tricky, so consult the installation manual closely. Connect the wires according to the color code or labeling. If you’re unsure, don’t hesitate to call a pro. Safety first!
Step 5: Attach the Charger
Once the wiring is all set, attach the charger to the bracket. Make sure everything fits snugly and securely. Finally, power it up and do a test charge to ensure everything’s working perfectly.
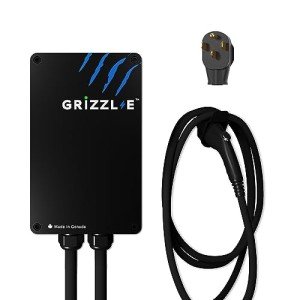
Manwe Grizzl-E Level 2 EV Charger with 24ft Cable
Power up your electric vehicle quickly and easily with this durable and convenient 24ft charger
Product information
$349.99 $299.99
Product Review Score
4.37 out of 5 stars
204 reviewsProduct links
Tips for Safe and Efficient Charging
When you’re diving into EV Charger Home Installation, safety and efficiency are key. Here are some handy tips to help you get the most out of your charging setup.
First off, always pick the right location for your charger. Choose a spot that’s easily accessible and away from any hazards. Make sure it’s near your parking area so you can plug in without hassle. Keeping your charger out of direct sunlight will help it last longer and work better.
Next, use a quality charger that fits your vehicle's specs. Not all chargers are created equal, so double-check the power rating and compatibility. A good charger will not only charge quickly but also keep your vehicle's battery healthy.
Don’t forget about the electrical setup. If you’re not comfortable with electrical work, it’s best to hire a pro. They can make sure everything is safe and up to code. This will save you from potential headaches in the future.
Finally, keep an eye on your charging habits. If you can, charge your EV during off-peak hours to save on electricity costs and reduce strain on the grid. And remember to unplug once your car's fully charged; this helps preserve battery life and keeps everything running smoothly during your EV Charger Home Installation.


