
Choosing the right EV charger for your home can feel a little overwhelming at first, but it doesn’t have to be. The key is to think about your specific needs and how you plan to use your electric vehicle. Are you charging overnight, or do you need something quick for a top-off during the day? Knowing this helps narrow down your options.
First off, consider the power levels. Level 1 chargers plug into a regular outlet and work just fine for slower charging. However, if you drive a lot or have a longer commute, a Level 2 charger is a better fit. It charges faster and can get you back on the road in no time. Plus, it makes EV Charger Home Installation a breeze since many homes already have the necessary wiring.
Another important factor is compatibility. Check if the charger works with your EV model. Most chargers are fairly universal, but it’s a good idea to double-check. You don’t want to get all excited about a charger only to find out it’s not the perfect match for your ride.
Don’t forget about smart features! Some chargers have timers, energy monitoring, and even smartphone apps for control. These can make your EV Charger Home Installation even smarter, allowing you to keep track of your charging and save on energy costs.
Lastly, think about the installation process. Some chargers are easier to set up than others. If you’re not handy, it might be worth hiring a professional. Look for chargers that come with clear instructions or even offer customer support. This way, you can ensure everything goes smoothly and you’ll be charging in no time!
Preparing Your Home for Installation
Getting ready for your EV Charger Home Installation is easier than you might think! You just need to consider a few key things to make sure everything goes smoothly. First, take a good look at where you want to install the charger. Ideally, it should be close to where you park your car. Having easy access will save you time when you need to plug in.
Next, check your electrical panel. You want to make sure there’s enough power to support the charger. If you’re not sure, it might be a good idea to call an electrician. They can assess your panel and let you know if an upgrade is needed. This step can help prevent any surprises during installation.
Also, think about the type of charger that fits your needs. There are Level 1 chargers that plug into standard outlets and Level 2 chargers that require a bit more setup. If you want faster charging, a Level 2 charger is the way to go. Make sure you have the right type chosen before the installation day.
Lastly, create a safe and clear workspace. Move any items away from where the charger will be installed, both inside and outside. This way, the technicians can work efficiently. Preparing your home well makes the EV Charger Home Installation quick and hassle-free!

Waterproof Magnetic EV Charger Port Cover - Black
Keep your EV charger protected and dry with this magnetic waterproof cover that’s easy to use and fits snugly
Product information
Product Review Score
4.15 out of 5 stars
121 reviewsProduct links
Step by Step Installation Process
Installing your EV charger at home doesn't have to be a headache. Just follow these simple steps to get it set up and ready to use in no time.
Step 1: Choose the Right Location
Find a convenient spot in your garage or outside your home where the charger can easily reach your electric vehicle. Make sure it's close enough to an electrical outlet or power source without being a trip hazard. Keep in mind that an outdoor installation needs to be weatherproof.
Step 2: Gather the Necessary Tools and Materials
Step 3: Install the Charger
Follow the instructions that come with your EV charger. Most chargers will need to be mounted to a wall. Use your stud finder to locate the studs, then drill holes and secure the mounting bracket. Once that’s done, connect the wiring according to the manual. If you’re not comfortable with electrical work, don’t hesitate to call a professional. Safety first!
Step 4: Test the Installation
Once everything’s hooked up, plug it in and give it a test run. Check that all indicators are working and ensure your vehicle charges properly. If everything looks good, you’re set! Enjoy the convenience of having your own EV charger at home.
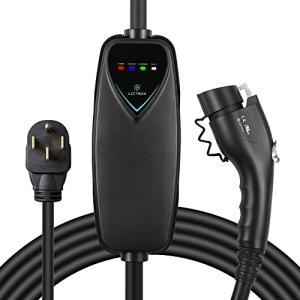
Lectron Level 2 Portable EV Charger, 40 Amp
Charge your electric vehicle quickly and conveniently from home or on the go with this powerful portable charger
Product information
$285.99 $239.99
Product Review Score
4.79 out of 5 stars
147 reviewsProduct links
Testing and Using Your New Charger
Getting your new charger up and running is exciting! Before you plug in your electric vehicle, let’s make sure everything is working smoothly. First, check the installation. You want to ensure that the charger is mounted securely and that all wiring is in place. It’s a good idea to have those installation instructions handy in case you need to refer back to them.
Once you confirm everything looks good, it’s time for a quick test. Turn on the charger and check for indicator lights. Most chargers have lights to show they’re working properly. You might see green lights for a successful connection or red for issues. If something doesn’t look right, double-check your connections and read the troubleshooting section in the manual.
After the test, plug in your electric vehicle and watch the charging process. You want to see that it starts charging without any hiccups. Keep an eye on how long it takes to get to a full charge. That’ll give you a feel for your charger’s performance and reassure you about your EV Charger Home Installation.
If you run into any issues, don’t stress too much. Most chargers have customer support or online resources to help you out. Sometimes, a quick reset or a call to customer service can sort out any hiccups. Enjoy your new setup, and get ready to hit the road with confidence!


