
Picking the right EV charger can feel like a puzzle, but it doesn’t have to be complicated. Start by figuring out what type of EV charger suits you best. Level 1 chargers use a standard household outlet and are easy to set up but can be slow for charging. This option works well if you don’t drive much or can charge overnight. Level 2 chargers, on the other hand, offer faster charging and usually require professional installation. If you drive regularly or have a larger battery, this is likely your best bet.
Next, consider your home’s electrical capacity. If your home has a 240-volt outlet, you can plug in a Level 2 charger directly. If not, you may need to upgrade your home's wiring. It’s a good idea to consult with an electrician who understands EV Charger Home Installation to help you make the right choice based on your setup.
Don’t forget about the features! Some chargers come with smart technology that lets you monitor your usage and control the charging from your smartphone. That’s handy if you want to take advantage of lower electricity rates at night. Also, look for a charger with a long cable length. You want to make sure you can reach your vehicle without any hassle.
Lastly, budget plays a crucial role. Chargers can vary in price, so set aside some time to shop around. Invest in a quality charger that fits your needs rather than going for the cheapest option. Keep in mind that a reliable, efficient charger will save you money in the long run.
Preparing Your Home for Installation
Getting your home ready for an EV Charger Home Installation is super important. You want everything to run smoothly, right? Start by choosing the perfect spot for your charger. Ideally, this should be somewhere close to where you park your electric vehicle. Whether it's in the garage or outside, make sure there's easy access to a power source.
Next, look around for any potential obstacles. Are there tree branches, garden decorations, or other things that might get in the way? Clearing a path makes installation much easier for the technician, and it ensures your charger will have a long, happy life.
Also, consider your electrical panel. Check if it can handle the load of your new charger. If it’s old or you’re unsure, it might be worth getting an electrician to take a look ahead of time. This step can save you from any surprises during the installation.
Finally, think about permitting. Some areas require permits for EV Charger Home Installation. It’s a good idea to check local regulations beforehand so you won't run into any delays. Getting these details sorted out in advance makes the whole installation process a breeze!
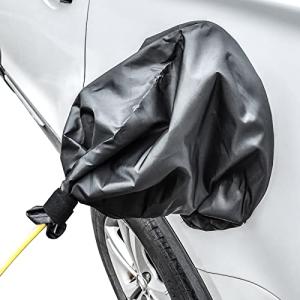
Electric Vehicle Charger Port Cover - All-Weather Protection
Keep your charger safe from the elements with this durable cover designed for every season
Product information
$8.99
Product Review Score
4.96 out of 5 stars
25 reviewsProduct links
Installation Steps Made Simple
Getting your EV charger set up at home shouldn’t feel like rocket science. With some careful planning, you can have everything ready in no time. Here’s a straightforward look at the installation steps that’ll make your EV Charger Home Installation a breeze.
Step 1: Choose the Right Location
Find a spot where you can easily access your EV and where the charger will get power. Many people prefer the garage or close to their driveway. Just make sure it’s within reach of your power source, and consider any potential future needs, like adding more chargers.
Step 2: Gather Your Materials
Make sure you have all the tools you’ll need, such as a drill, socket wrench, and screwdrivers. Don’t forget your charger and any additional mounting hardware that might come with it. Having everything on hand before you start will save you a lot of time.
Step 3: Mount the Charger
Follow the manufacturer’s instructions to securely mount the charger on the wall. Usually, it involves drilling holes, securing brackets, and then attaching the charger to those brackets. Just take your time, and make sure everything is level and tight.
Step 4: Electrical Work
This part can get a little tricky. If you’re not comfortable with electrical tasks, it’s smart to hire a qualified electrician. They can ensure that the wiring meets local codes and safely connects to your electrical panel. Safety first!
Step 5: Test It Out
Once everything is in place, it’s time for a test run. Plug in your EV and make sure everything’s working as it should. If it’s all systems go, you’re ready to enjoy fast, convenient charging at home!
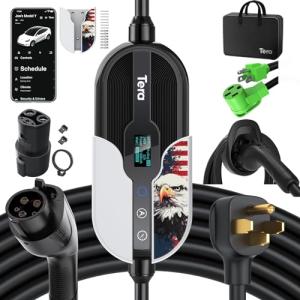
Tera Tesla EV Charger Level 1 & 2, 32A/16A
Charge your Tesla at home or on the go with this powerful and versatile EV charger
Product information
$244.50
Product Review Score
4.37 out of 5 stars
198 reviewsProduct links
Testing and Using Your New Charger
First, make sure everything is set up correctly. Check that the charger is securely mounted and connected to your electrical system. If your charger has indicators, look for any warning lights. A steady green light typically means you’re good to go. If you see red or flashing lights, take a moment to check the manual or contact customer support.
Once you’ve confirmed everything looks good, it’s time to charge your vehicle. Just park your EV close to the charger, so the cable can reach without stretching. Plug the connector into your vehicle's charging port. You should hear a click or feel it lock in place. Most EVs will show a charging status on their dashboard or app, so keep an eye on that to ensure everything is working smoothly.
If you’re charging for the first time, it’s good to monitor the process. Check how long it takes to charge up your battery to get a feel for the charger’s speed. Different charges might have different rates, but knowing what to expect helps in planning your trips better. Remember, keeping your battery between 20-80% is a sweet spot for good health!
So there you have it! Testing and using your new charger is simple if you follow these steps. Enjoy your convenient charging experience and embrace the ease of EV Charger Home Installation!


