
Picking the right spot for your charger might seem like a small detail, but it really can make a big difference. Let’s break it down so you can get your Electric Vehicle Charger Installation off to a smooth start!
First up, consider proximity to your electrical panel. It’s usually easier and cheaper to connect your charger if it’s not too far from where your home’s power comes in. The closer you are, the less wiring you’ll need. Plus, you won’t have to deal with any extra installation headaches.
Next, think about how you park your vehicle. If you tend to park in the garage or on the driveway, placing the charger in those spots makes a lot of sense. That way, you can plug in as soon as you arrive home, making your life just a bit easier.
Also, keep accessibility in mind. You want to make sure the charger is easy to reach but also safe from potential damage, like from snow or rain. Look for spots where you can install it securely, out of the way of foot traffic but still convenient when you need to charge up.
Finally, make sure your chosen location has enough space for any accessories you might want, like a longer charging cable or a smart EV charger. Planning ahead means you won’t have to shuffle things around later on!
Essential Tools for Installation Success
Installing your electric vehicle charger can be a breeze with the right tools in hand. First things first, you’ll want to make sure you have a good set of basic tools. A sturdy screwdriver, pliers, and a wrench are must-haves. These will help you with securing everything tightly, so your charger stays put and works smoothly.
Next up, you’ll definitely want a voltage tester. This little gadget is a lifesaver. It helps you check if the power is off before you dive into any wiring. Safety is key, and a voltage tester ensures you avoid any nasty surprises when you’re working with electricity.
If you’re feeling ambitious and tackling the installation on your own, consider grabbing a drill and some screws. Depending on your wall type, you might need these to mount your charger securely. Just make sure you pick the right screws for the job. You don’t want your charger falling off the wall after you’ve put in all that effort!
Lastly, having some zip ties around can help clean up any messy cables. Keeping things organized not only looks better but also helps with safety. Tidy wiring means less chance of snagging on something or tripping over a cord. With these essential tools, your electric vehicle charger installation will go off without a hitch!
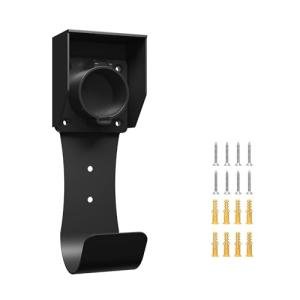
MAX GREEN Wall-Mount EV Charger Nozzle Holder
Keep your charging space organized and tidy with the MAX GREEN Wall-Mount EV Charger Nozzle Holder
Product information
$24.98 $18.55
Product Review Score
4.78 out of 5 stars
67 reviewsProduct links
Step by Step Installation Instructions
Getting your electric vehicle charger set up at home might seem like a daunting task, but it’s actually pretty straightforward. Follow these easy steps to tackle your Electric Vehicle Charger Installation like a pro!
Step 1: Gather Your Tools and Equipment
Before you dive in, make sure you have everything you need on hand. This typically includes:
Having these tools ready to go will make the process smoother.
Step 2: Choose the Right Location
Pick a spot that’s close to your electrical panel and your parking space. Make sure it’s easily accessible. Check whether it’s sheltered from weather or hazards, if possible. It’s smart to use a stud finder to ensure you’re mounting your charger securely. Once you’ve found the perfect location, mark the drill points with a pencil.
Step 3: Install the Charging Unit
Using your drill, make the holes at your marked points. Most chargers come with brackets or mounting plates. Secure these to your wall. Then, attach the charging unit to the bracket and double-check it’s level. You want it nicely positioned without any wobble!
Step 4: Connect the Wiring
Now it’s time to get a bit electrical! If you're comfortable, you can connect the wiring yourself. For safety, always turn off the power from the main panel first. Follow the manufacturer's instructions closely for connecting power and ground wires. If this part feels a bit tricky, don’t hesitate to call in a professional. Safety first! After the connections are made, turn the power back on and test the charger!

Lectron EV Charger Dock and J-Hook Combo
Keep your electric vehicle charged and organized with this convenient dock and J-hook combo
Product information
$18.99
Product Review Score
4.29 out of 5 stars
142 reviewsProduct links
Tips for Safe and Efficient Charging
When it comes to electric vehicle charger installation, keeping things safe and efficient is key. Here are some solid tips to help you charge your EV without a hitch.
First off, always use the right charger. Make sure your charger matches your car's specifications. Using a charger that doesn't suit your vehicle can lead to slow charging or even damage your battery. Checking compatibility is like reading the manual; it saves you time and potential headaches.
Next, look for the right spot for your charger. Ideally, you want it installed in a dry, clean area that’s easily accessible. Avoid spots near water sources or heavy foot traffic. A good spot not only makes charging easier but also keeps it safe from accidental knocks or spills.
Don’t forget about electrical safety. If you’re not comfortable with wiring, consider hiring a professional for your electric vehicle charger installation. A pro can ensure everything is connected correctly and up to code. This investment pays off by keeping your home and car safe.
Also, consider setting charging schedules. Many modern chargers allow you to set specific times for charging. This can save you money, especially if you can take advantage of off-peak electricity rates. Plus, there’s something satisfying about plugging in and knowing your car will be ready when you are.


