
Next, check the charger’s power level. Most home chargers come in Level 1 and Level 2 options. A Level 1 charger works with a standard outlet, but it’s slow—think of it as trickling water. A Level 2 charger, on the other hand, hooks into a 240-volt outlet and charges much faster. If you want quick and efficient charging, go for that Level 2 option.
Consider compatibility too. Not all chargers play nice with every electric vehicle. Make sure the charger you’re eyeing works with your car. Most modern chargers are versatile, but double-checking can save you a headache later.
Finally, think about installation. Some chargers are easier to install than others. If you're not up for DIY Electric Vehicle Charger Installation, look into how much professional installation might cost. Some brands even include installation services, so keep an eye out for those offers.
Tools You Need for Installation
Getting your electric vehicle charger set up doesn’t have to be a chore. With the right tools, you can breeze through the installation process. Let’s check out what you’ll need to tackle this project.
First off, a basic tool set is essential. You’re going to want a good screwdriver (both flathead and Phillips) for any screws you might encounter. A ratchet set will also come in handy for tightening bolts. Consider grabbing some wire strippers, too; these will help you prepare your electrical wires and ensure a solid connection for your charger.
Next, don't forget about safety gear. A pair of gloves protects your hands while working with electrical components, and safety goggles will keep your eyes safe from any accidental debris. Depending on your setup, you might also need a voltage tester to make sure everything is safe before you connect anything.
Lastly, make sure you have a level handy. This helps you install your charger straight and prevents future issues or adjustments. If your installation involves a heavy-duty electrical circuit, having a friend around can make things smoother and safer during the Electric Vehicle Charger Installation process.
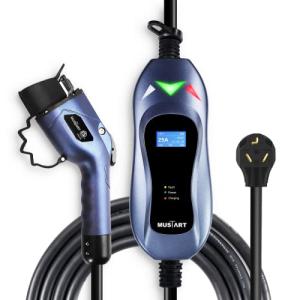
MUSTART Level 2 Portable EV Charger 25ft Cable
Charge your electric vehicle quickly and conveniently with this portable charger featuring a generous 25-foot cable
Product information
$279.00
Product Review Score
4.75 out of 5 stars
174 reviewsProduct links
Step by Step Installation Process
Installing your new electric vehicle charger might sound a bit daunting, but it’s actually pretty straightforward! Here’s a simple step-by-step guide to make your electric vehicle charger installation a breeze.
First up, choose the right spot for your charger. Ideally, you want it close to your parking space and near your electrical panel. Check local codes to ensure you're compliant with any regulations. Once you’ve picked the perfect spot, you’ll need to gather your materials like a mounting bracket, screws, and, of course, your charger.
Next, it’s time to mount the charger. Use a level to make sure it’s straight, mark the holes, and drill them into the wall. Secure the mounting bracket with screws, making sure it’s solid and can handle the weight of the charger. After that, attach the charger to the bracket, making sure everything fits snugly.
Now for the wiring! If you're handy, you might tackle this part yourself. For safety, make sure to turn off the power at your circuit breaker. Connect the wires from the charger to your electrical panel, following the specific instructions provided with your device. If you're unsure or uncomfortable, don’t hesitate to call an electrician.
Finally, once everything is connected, turn the power back on and test your charger. Make sure it powers up and starts charging your vehicle as it should. With this electric vehicle charger installation process, you're all set to hit the road with confidence!
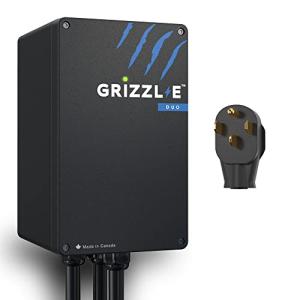
Grizzl-E Duo Level 2 EV Charger with 40 Amp
Fast charging for all your electric vehicle needs that fits right at home
Product information
$799.00
Product Review Score
4.71 out of 5 stars
229 reviewsProduct links
Tips for a Smooth Charger Setup
Setting up your electric vehicle charger doesn’t have to be a hassle. With a few tips, you can make the process smooth and stress-free. The key is to plan ahead and know what to expect. Here’s how you can ace your Electric Vehicle Charger Installation.
First things first, make sure you’ve chosen the right spot for your charger. Look for an area near your parking space that's close to a power source. Avoid placing it in dark corners or areas where it might get damaged by weather. If your garage is cluttered, consider tidying things up a bit to create a safer space.
Next, check your home’s electrical capacity. If your electrical panel is older, it might not support a strong charger. Consult an electrician to see if upgrades are necessary before starting the Electric Vehicle Charger Installation. They can tell you if you need a dedicated circuit to avoid overloading your system.
When it comes to the actual installation, follow the manufacturer's instructions closely. If you’re not comfortable doing the setup yourself, hiring a professional will save you time and energy. It's important to ensure everything is connected properly to avoid any safety issues down the line.
Lastly, don’t forget to test your charger after installation. Plug in your vehicle and check if it charges as expected. This is the perfect time to familiarize yourself with the charger’s features. Taking these steps will help you enjoy a seamless charging experience whenever you need it!


