
Choosing the right charger for your electric vehicle is super important. With so many options out there, it can feel a bit overwhelming. But don’t worry, I’ve got your back! Start by knowing the type of electric vehicle you have. Different models have different charging requirements. Some can handle faster charging, while others need a gentler touch. Make sure you look at your car's manual or the manufacturer's website for specific recommendations.
Next, think about where you’ll be using the charger most. If you're installing it at home, a Level 2 charger is usually a great choice. It offers faster charging times, so you won’t be waiting around forever. On the other hand, if you’re mostly relying on public chargers, you might want something portable that you can easily take with you. This flexibility lets you charge wherever it's convenient, and it’s especially handy if you travel a lot!
Don’t forget about plug compatibility! Most electric vehicles use a standard plug, but some may require an adapter. Double-check that your charger comes with the right plug for your vehicle. Also, keep an eye on the amperage of the charger. Higher amperage means quicker charging, but make sure your home setup can handle it. Getting an electrical inspection can be a smart move to ensure everything runs smoothly.
Finally, invest in a quality charger from a reputable brand. This ensures your charger will last and do its job without any glitches. Check for warranties and customer support options, too. It’s always nice to have peace of mind when you’re setting up your Electric Vehicle Charger Installation at home!
Preparing Your Space for Installation
Getting your space ready for Electric Vehicle Charger Installation is super important. A little preparation goes a long way in making the process smooth and hassle-free. Start by choosing a location that’s convenient for plugging in your vehicle. Ideally, this should be close to your electric panel and parked vehicle.
Next, clear the area around where you plan to install the charger. You want to ensure there's enough room to access the charger easily and for any necessary installation tools. Check for any obstacles like furniture, debris, or landscaping features that might be in the way. This makes the installer's job easier and speeds up the process.
Look at your electrical panel too! Is it easily accessible? Make sure it can handle the electrical load of the new charger. If you're unsure, it’s wise to consult an electrician before you start. They can give you a clear picture of what your setup can manage and if any upgrades are needed.
Lastly, think about safety. If you’re installing outside, make sure the area is protected from weather elements. You’ll want to avoid spots that might flood or are overly exposed to sunlight. Taking these precautions will help you enjoy your new electric vehicle charger without any hiccups down the road!

BiaHawn Level 1&2 EV Charger for Tesla & J1772
Charge your Tesla or J1772 vehicle quickly and easily at home with this versatile EV charger
Product information
Product Review Score
4.65 out of 5 stars
212 reviewsProduct links
Step by Step Installation Process
Installing your electric vehicle charger might sound complicated, but it’s really just a series of straightforward steps. Here’s a simple guide to help you with your electric vehicle charger installation. Let’s break it down!
First things first, gather all your tools and equipment. You’ll need the charger itself, mounting brackets, screws, a drill, and a few basic hand tools. Don’t forget to turn off the power at your circuit breaker! Safety first, right?
Next, pick the perfect location for your charger. It should be easily accessible for your vehicle, preferably near your parking spot. Once you have the spot in mind, use the mounting bracket as a template and mark where you’ll drill holes for the screws. Drill those holes and attach the mounting bracket securely.
Now, it’s time to connect the wiring. If your charger requires a dedicated circuit, this part might need a professional touch. For those who are comfortable with electrical work, follow the manufacturer’s instructions carefully, connecting the wires to the charger and making sure everything is snug and secure. Finally, mount the charger onto the bracket!
To wrap things up, turn the power back on and test your charger. Plug in your vehicle and see if it’s working as it should. If everything's running smoothly, congratulations! You’ve just completed your electric vehicle charger installation. It's really that simple! Enjoy the convenience and peace of mind that comes with charging at home.
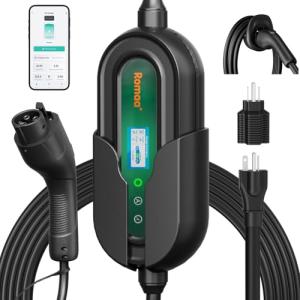
Portable Level 1&2 EV Charger with APP Control
Charge your electric vehicle anytime, anywhere with smart app controls for added convenience
Product information
$119.99
Product Review Score
4.9 out of 5 stars
158 reviewsProduct links
Testing and Troubleshooting Your Charger
First, plug in your electric vehicle and check if the charger lights up. Most chargers have an indicator light that shows whether they're powered on or if there’s an issue. A solid green light usually means everything’s good to go, while a blinking or red light might signal a problem. Don’t ignore those lights!
If your charger isn't working, don’t panic. Start by checking your circuit breaker. Sometimes, power trips can happen and flipping the breaker back on might just do the trick. Also, inspect the cords and connections. Make sure everything is plugged in tightly and there are no visible damages.
In case your charger still isn’t functioning, consult the user manual. This often has troubleshooting tips specific to your model. If you hit a dead end, reaching out to customer support can provide additional help. They can walk you through diagnostics to get your charger up and running again.
With the right approach, testing and troubleshooting your new charger can be quick and painless. Follow these steps, and you’ll be charging your electric vehicle in no time!


